Thursday, June 20, 2013

Where did they all go?

It's just a day before the official start of summer and those pesky Japanese beetles that most always made an appearance in early June are nowhere to be found in 2013! Tis a puzzler for sure.

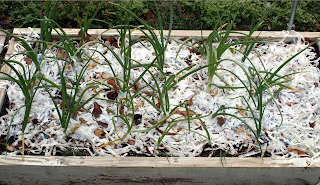
Also, AWOL are the ticks (hunters have killed all the deer in my area), the grasshoppers. mosquitoes and the other irksome insects that generally make gardening such an irksome battle! The only real problems I've encountered, thus far, are tiny flea beetles which took an early and lasting liking to my potato plants. The shotgun appearance of the leaves, pictured above, are testament to their collective hunger. In spite of that, the tater plants seem to be surviving just fine.

This 'insect free' situation has made for a very pleasant spring down here in southwest Missouri. But, it makes me also wonder if this is natural for nature – i.e. some cyclical species variation, or is this a trend that could prove deleterious down the road? You know, like the honey bees that are disappearing worldwide. A side note: i.e. means "that is". It's from the latin "id est"!

Monday, June 3, 2013

Home grown tomatoes! This year for sure!

While I've never been accused of having a green thumb, I generally do alright in the home garden arena. Over the years, I've produced bumper crops of romaine lettuce, Kentucky pole beans, onions and even some potatoes just last season. But, its tomato growing where I've consistently fallen on my face. I'm not sure what it is I'm doing wrong, but something always seems to go wrong. One year it was deer that ate all my plants down to the ground, and then over the past couple of seasons ,it's been both the deer and some hungry Japanese beetles that have left me having to resort to farmers markets in order to sate my appetite.

But this year is going to be different! First off, all the deer have been killed by hunters and not only are they not around but the tics that generally accompany them have bee absent too. That just leaves those pesky beetles and they are due to show in just a few more days! But, I'll be ready for those little critters with lots of grow cloth or as its commercially known reemay. And, any deer that might show up will have to cut their way through some chicken wire. Wish me luck!

Monday, May 13, 2013

A radish growing experiment!

Like onions, radishes are easy to grow. Just sow some in standard soil, water well and in about a month's time you have a tasty addition to your salads. That's the theory anyway...

Just plain old everyday soil that has not been fertilized or heavily amended is supposed to be okey-dokey with most radish plants. According to the experts, too much nitrogen will give you a lot of tops with no root development. The same goes for overcrowding the little guys too! You need to sow them about 2 to three inches apart just below the surface of the soil, water on a regular basis and supposedly that's about all you have to do. Did you know that the tops are also edible (a little known fact) and also make a great 'peppery' addition to spring salads? I've gotta try that one myself!

The problem with some radishes, it seems, is that sometimes the roots just don't develop very well if at all! Or, they might be pithy or hot! I've been given all sorts of reasons why this might be so. The two chief being overcrowding and too much nitrogen in the soil. Other reasons have included very hot weather and under-watering. To find out if these were true, I wanted to do a little experiment to quantify this effect by tracking some of the variables that might affect their growth patterns and ultimate development.

---------------------------The Experiment

For this experiment I chose the Cherry Belle radish variety as it is very popular in my neck of the woods and tastes great! For the growing area, I chose a one foot square are in a raised bed in mid May 2013 (cool temps) where I planted one seed two inches apart from its neighbor – this arrangement allowed me to place 25 seeds inside the foot square area in such a manner that there was no other plants growing any closer than 2 inches (see chart). A situation that satisfied the requirement that many say a radish need to reach its full potential.

The soil I used was the soil that has been in place in the raised bed for a number of years. After digging below the surface, I determined that there were earthworms present (a great indicator that the soil is somewhat fertile as worms will not hang out in poor soil or soil that been over fertilized). So, the requirement that the soil not be nitrogen rich was also checked off.

The test area was watered by hand on the days when it didn't rain and a cover was placed over the area on days when the temperature got above 80°F. So, then, all the variables were covered pretty well. As a part of this experiment, I maintained a log of these factors in a data file, the results of which will be made available as a pdf document.

-------------------------The Variables

On a daily basis, I measured the following factors: 1) the daily hi and low temperatures, 2) the soil temperature at mid day two and a half inches down in the root zone, the condition of the soil (wet, damp, dry) each morning and 3) the general condition of each of the 25 plants whereby any root development was noted.

Recording all this data meant a rather demanding schedule to maintain for a whole month, but it seemed worth it to me to see if I could figure out which radishes developed well and which did not (and if not), why not!

------------------------Day One

As a part of the initial preparation, I assembled a simple planting grid using firing strips, nails and
some string. The grid was set up so that each seed would be at least two inches away from another seed, so as to allow for lots of growing room. This assembly took about thirty minutes.

Next, I lightly dug up a square foot area in a raised be out back. I then used my finger to make 1/8 inch depressions in the soil below each of the grid crossings. Each depression received just one seed and was then covered over lightly with soil. The soil was then patted down to insure a good soil to seed contact and watered the area lightly.
I also constructed a simple data file using FileMaker Pro to help me keep track of the variables I described earlier in the text. Here is a sample of what one entry might look like at left. Clicking on it (or any graphic) will enlarge it for easier viewing. 

Update: Three days later, on May 16, six radish seeds had germinated. 

Update: March the 24th and the radish plants now are developing true leaves! Click on the picture to enlarge it!


I WILL UPDATE THIS ENTRY FROM TIME TO TIME OVER THE NEXT MONTH SO AS TO TRACK THE PROGRESS OF THIS MOST BURNING QUESTION...

Update: June 15 2013 - Well, baring some last minute miracle, I'm sad to report that this experiment was pretty much a failure on just about all counts. Of the 25 onions that were seeded, only one has amounted to any thing. It was 2 cm wide and about  about 3 cm long and weighted in at only 5 grams. I plan to do this experiment over again, but will change two factors; 1) I plant to double the growing space between the radishes by cutting the number planted in half (12 this time around) and 2) I will be using a blend of Miracle Gro potting mix and sand to grow them in!

Wednesday, May 8, 2013

My 2013 vegetable garden is off to a shaky start!

A brave pepper begins its journey of growth!
Cool springs are a ying and a yang for us vegetable gardeners. The ying is that the cooler temperatures generally also mean a wet spring which has been the case so far this year. The yang has been later plantings as a result of the soil being both too wet and too cold early in the season. But, now that it has finally begun to warm up a bit, I've learned to plant on the days when it's not actively raining.

So far, at least as of May 2013, I've manage to get the following into the ground:

Onions planted as sets in March
Seed potatoes that were also planted in March
Radish seed in April
A small group of Romaine lettuce starts in mid April
Bell pepper and hot pepper starts that look a bit stringy and lanky just this past day
Nantes carrot seed on May the 7th
Four cucumber starts on the same day (good luck with these making it)
and a lone Brandywine start that was transplanted into a large pot out front!

I still have a four pack of basil and a few more bell pepper starts that need to go out and which I hope to get done on May the 8th even though more rain is threatening.

The National Weather Service down here in southwest Missouri is just now beginning to hint at a dry and hot week coming up! That would be good news just as long as we don't slide back into a drought condition like what plagued the Midwest last year!

With rising food prices now more or less the rule, I'm hoping to bring in a fairly decent home crop this year! Right now iceberg lettuce is going for $2 a head and a lone bell pepper is close to a dollar!

Wednesday, April 10, 2013

An onion set in a pot!

For reasons that still elude me, I decided it might be a fun thing to plant a lone yellow onion set into a ceramic pot and watch it grow. I did this on March 25 and used Miracle Gro potting mix, (something that may come to haunt me later on).

The little guy sat there from that day of planting until after the first week of April when I happened to notice that a green growing point had erupted from the top. Wow! I moved the pot, at that point, to a location on a balcony where it could get some sun. That was on April the 7th, if I remember correctly. It measured 4 centimeters from the soil line to the highest point at that time.

Not long after, on April the 8th , I took another measurement and noted it was now 6.4 centimeters tall and and then today (the 10th) I found the highest point to be 11 centimeters! This baby is really growing strong! Once again, however, I'm worried that the added fertilizer will affect any bulbing in a poor way. Onions, it seems, like to be stressed both nutritionally and in terms of water in order for them to reach their maximum 'bulbing' potential. When those factors are not present, or when it gets too hot, they are more likely to bolt or to grow lots of tops with no real onion 'bulb' developing at all.

I'll make it a point to track the progress of this little guy over the course of the next couple of months to document how it does. Uh oh, here's come the evil Dr. Brussels. I'd better hide my onion!

 -------------------------------------

Hello! - This is DanO's psychiatrist, Dr. Brussels. DanO is currently residing at the Sunnybrook Sanitarium and is doing very well, or so we had thought. For some reason, though, he's become fixated on onions to the exclusion of most everything else. And, while we were confident of his release earlier on, the staff has reached the conclusion that perhaps it would be better for him to stay at Sunnybrook for the time being.

Dr. John Brussels
Sunnybrook Sanitarium
Forsyth, MO

Update: I received a mercury injection and am feeling much better now! This picture of the onion in a pot wa taken on May the 8th. Like me, it's still hanging in there!

May 18, 2013 Update: My onion in a pot is still growing well. It now has eight 'leaves' and is not showing any sign of bolting.  

June 15, 2013 - The onion has really grown well in this
potting mix! 


 Here it is early July and the little guy is still doing pretty well with a the guy now about 5 and a half centimeters across! I'll do a followup post of this onion when I harvest it later in the month! See the harvest day pictures here!


Saturday, March 30, 2013

Onion Set Experiment YS3213 Update!


It’s been close to a month now since I planted thirty six yellow onion sets in a small raised bed on March 2, 2013. They are part of an experiment to chronicle how close to a perfect onion I can get. In past years, I’ve been frustrated in that many of my onions failed to significantly bulb up, while others bolted early on in the growing cycle. (See my ‘Onions are Easy to Grow’ video for some idea of how they have often looked)! The prior post can be found here.

For this experiment, I’ve used a loose soil and made sure to keep the plants well watered early on. I’ll need a cool spring too, for the best growing performance envelope, although I won’t be able to control that.

The planting grid I used here followed advice I found on the Internet that suggested each onion set be placed in columns spaced four inches apart with rows separated by six inches. Here is what that planting grid looked like pictured at right.

The weather, especially during the last couple of weeks of March was much colder than normal and so not much growth occurred. However, just recently, it’s begun to warm up nicely and good rates of growth have ensued. This picture at the top is a close up of a few of the larger plants (pictured are cells 12, 22 and 32). As you can see all of these sets are healthy in appearance with the 'large' set at top looking the largest. The only 'problem sets' consisted of a missing set in cell 26 (it was replaced) and a set that got somehow inverted - this was also corrected.
Scale is in centimeters

I measured each onion plant in terms of gross height just for comparison purposes. Row 1 consisted of the largest sets while rows 2-4 were medium in size. The bottom rows (5 & 6) contained the smallest sets of the lot. 

Interestingly, after I graphed out the results, I noted that most of the plants were relatively equal in size (± 2-3 cm) with the exception of the really large sets. 

So, everything is growing nicely. My next update will be on or around the end of April 2013.

Click on to enlarge
May 8, 2013 Update: Well it's been about 60 days since I planted the onion  sets and as you can see, they have grown quite a bit. At this time, I haven't seen any evidence of bulbing. The lower stem portions of some of the onions measured about 12 mm across.

May 22, 2013 Update: A fourth onion (cell # 4-4) had bolted and was harvested on this date.  The other three had bolted a week earlier and all of those were from the 'large' sized onion sets. This one was from the 'medium' sized sets. Of note too is another onion experiment that was started on the 17th of March of which there are also 25 plants - none of these have bolted. All the onions are about the same sized and none have shown any inclination to bulb up even as this experiment is entering the 80th day.

August 18, 2013 Update: I've been pulling onions out of this space for a couple of weeks now with plenty more to go. The average size was fairly small weighing in at about 43 grams. The picture here of three peeled onions weighed in at 130 grams. These guys, though small, were still a good investment as I have plenty to use for the next couple of months.


Wednesday, March 13, 2013

The high cost of online seed!


I’m not sure how companies like Burpee Seed manage to stay in the online seed business. I went to their site to order a packet of romaine seed yesterday and discovered that not only was the cost high ($4.95), but the shipping costs for that one small packet was also $4.95, bringing the total for this purchase to $9.90! Wow! A packet of seed for just under $10? What’s wrong with that picture? No way could I afford that kind of price structure. Especially, considering the fact that the very same item is should be soon available at a local Home Depot garden center for about $1.99!

Now, it’s true. For me to actually get to the seed, I’ll have to burn some gas. In my case, it’s a 30 mile round trip (I live in the country) and the cost in gasoline ($3.52 a gallon) would be about $6. So, unless I was going there for other purchases, I’d end up paying almost the same. Blame it on the skyrocketing cost of gas. (A problem that’s sure to get worst with a left leaning Administration bent on banning all fossil fuels).

I found that a better alternative would be for me to shop locally for seed. Every year about this time, my local Country Mart and even the hardware store down the road, have a few seed display racks out. And while the selection is rather limited, at prices as low as .99 a packet, that’s still quite a bargain.